Your First Transcription
Follow this guide to upload audio and create your first transcript in Stenoris.
Prerequisites
Before you begin, ensure you have:
- A Stenoris account (with credits or an active subscription)
- An audio or video file to transcribe (MP3, WAV, M4A, MP4, and more)
Step 1: Create a New Project
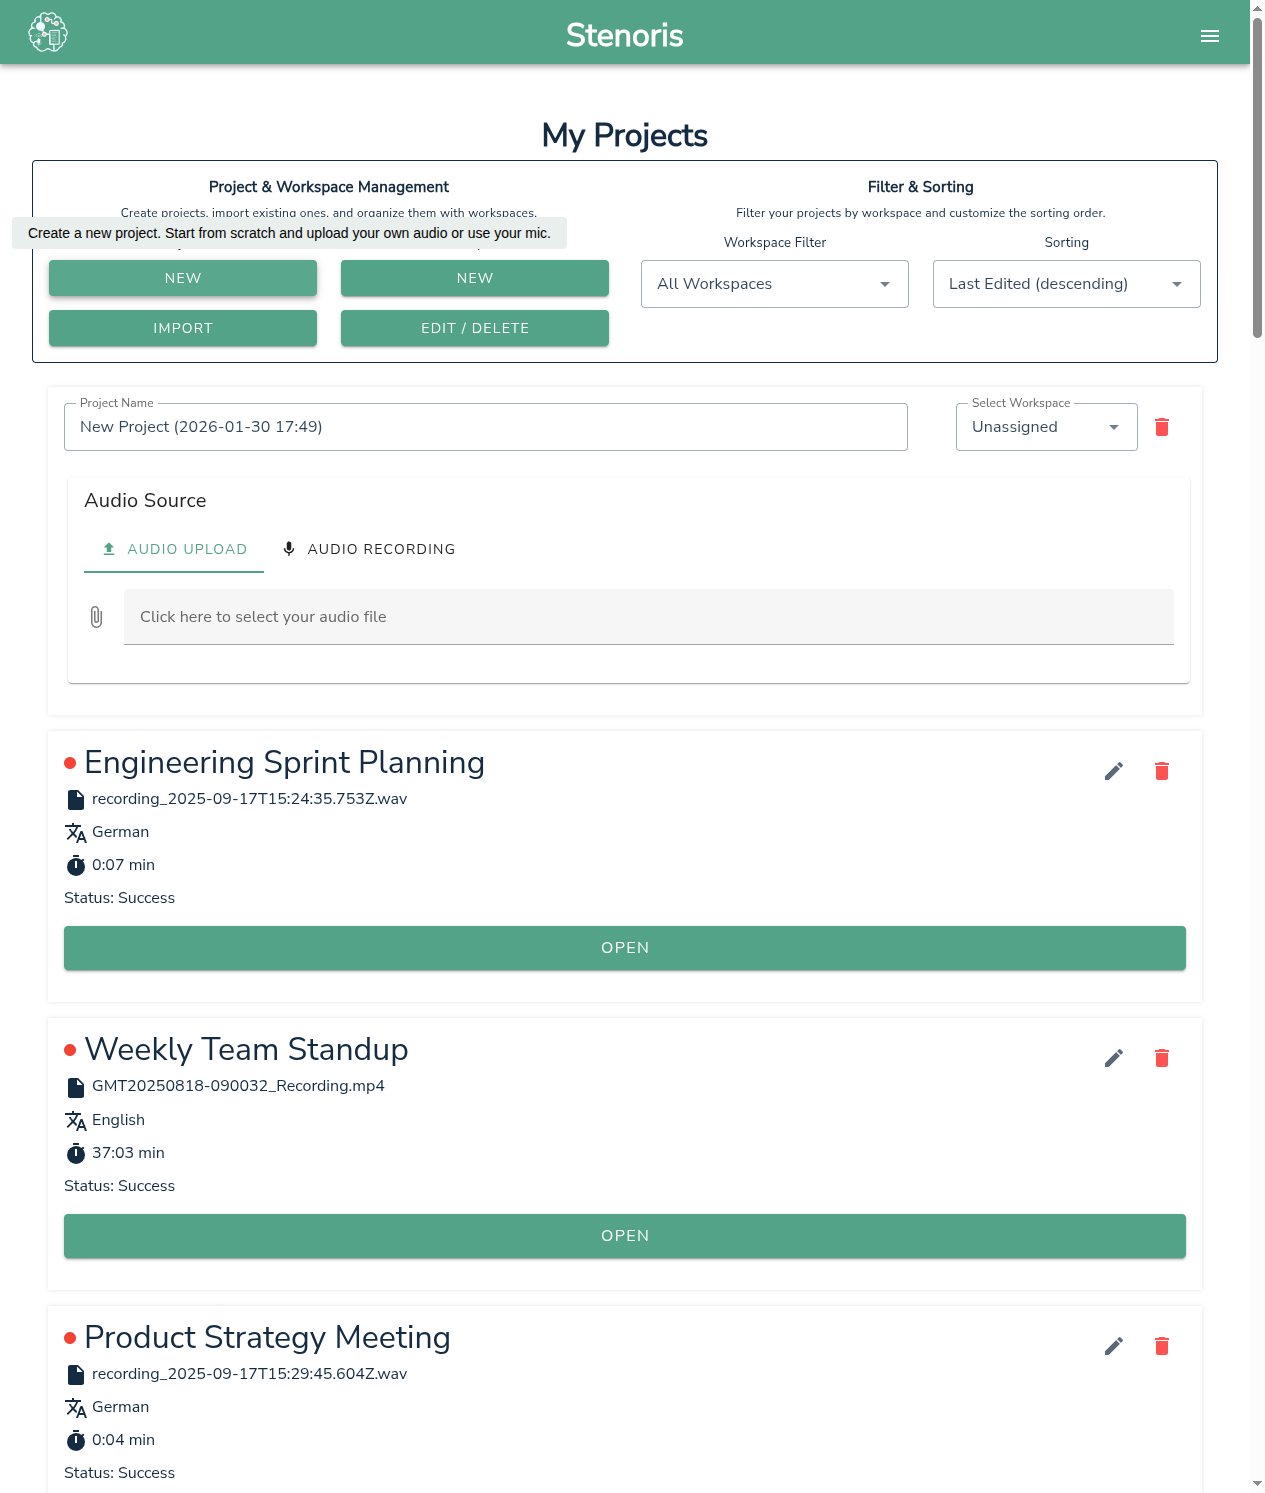
From the dashboard, click the New button under Projects to open the new project dialog:
- Project Name - Enter a descriptive name or keep the auto-generated one
- Workspace (optional) - Select a workspace to organize your project
Step 2: Choose Audio Source
You can either upload an existing file or record audio directly in the browser.
Option A: Upload a File

- Click Audio upload tab (selected by default)
- Click Click here to select your audio file
- Select your audio or video file from your computer
Supported formats: MP3, WAV, M4A, FLAC, OGG, MP4, MOV, AVI, and more.
Option B: Record Audio
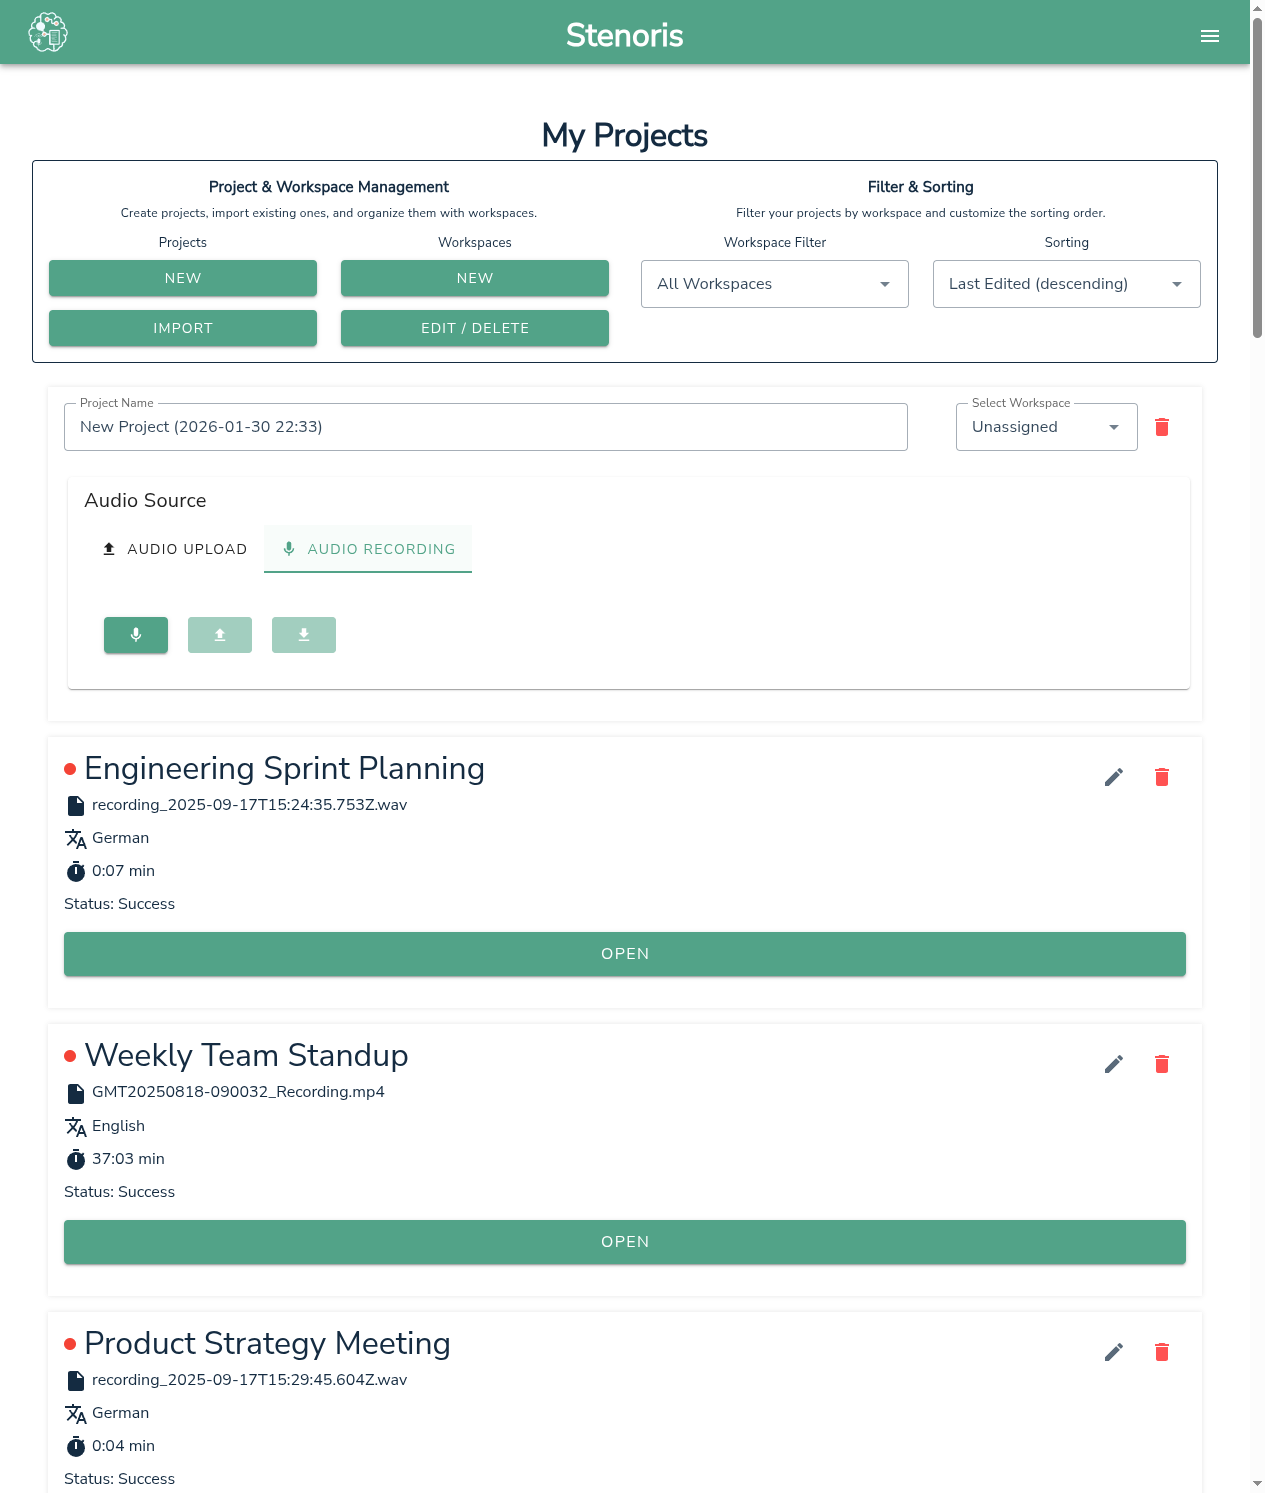
- Click Audio recording tab
- Click the microphone icon to start recording
- Click stop when finished recording
- Choose one of:
- Upload - Use this recording for transcription
- Download - Save the recording locally
- Discard - Delete and try again
Step 3: Configure Transcription Settings
After uploading or recording audio, configure the transcription settings:
Language Selection (Required)
Choose the primary language spoken in your audio file for optimal transcription accuracy. This is required before starting transcription.
Speaker Detection
| Option | Description |
|---|---|
| Automatically detect (default) | The system will automatically detect the optimal number of speakers in your audio |
| Manual selection | Uncheck the box and specify the exact number of speakers |
TIP
Automatic speaker detection works well for most recordings. Use manual selection when you know the exact speaker count and want to ensure precise diarization.
Data Confidentiality
| Setting | Description |
|---|---|
| Data sharing activated (default) | Combines proprietary algorithms with partner engines (Google, IBM, etc.) for optimal accuracy. Data may be processed outside Switzerland. |
| Data sharing deactivated | Processed only on Stenoris servers in Switzerland. Your data never leaves Swiss servers. May have slightly reduced accuracy. |
Important
Choose Data sharing deactivated for highly confidential content such as legal proceedings, medical records, or sensitive business information.
Email Notification
Check Email me when transcription is finished to receive an email notification when processing completes. Useful for longer recordings.
Step 4: Start Transcription
- Review the estimated transcription duration shown at the bottom
- Click Start transcription
- A progress indicator will show the upload status
Once uploaded, you can close the dialog - the transcription will process in the background. Your project will appear on the dashboard with a "Processing" status.
Processing Time
Transcription generally takes 20-40% of the audio duration, but this can vary depending on server load. A 10-minute recording typically completes in 2-4 minutes, though it may be faster during off-peak times.
Need guaranteed turnaround times? Contact us about enterprise solutions.
Step 5: Review and Edit
When processing completes, the status changes to "Success". Click Open to launch the editor.
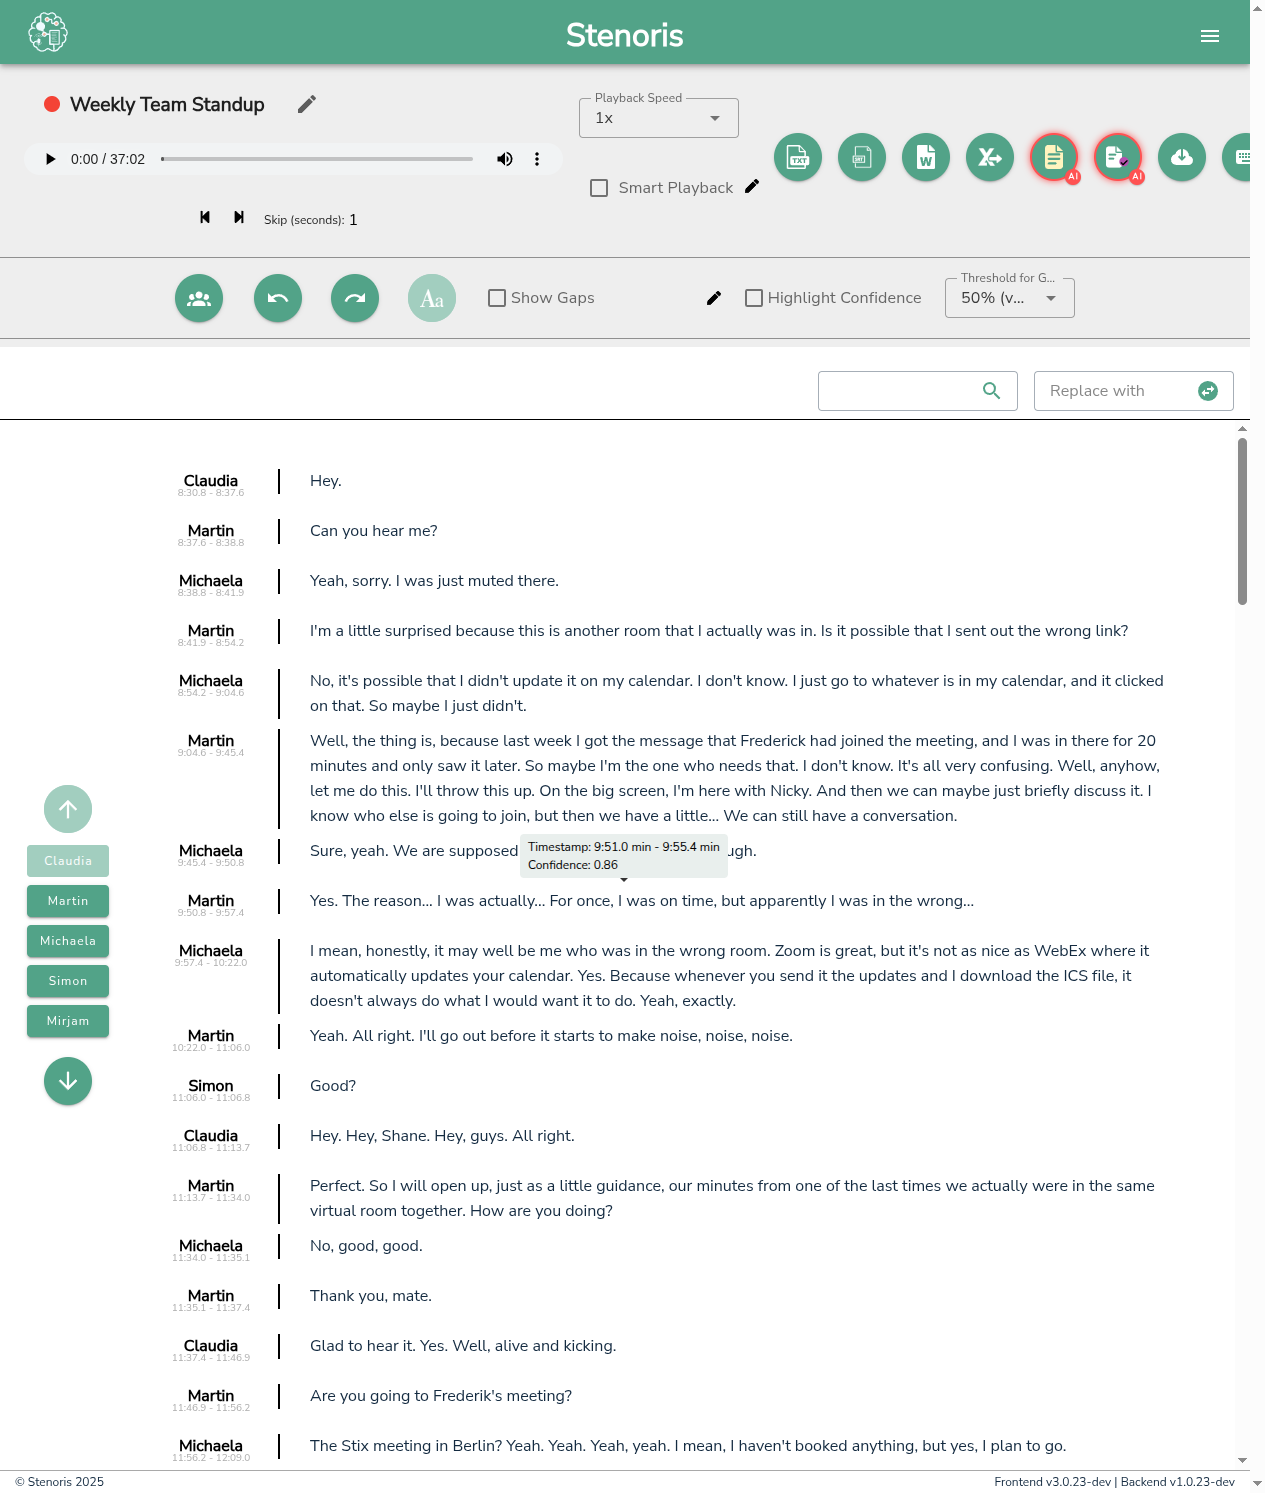
In the editor, you can:
- Play audio and follow along with highlighted text
- Click on any word to jump to that position in the audio
- Edit text directly - corrections are saved automatically
- Change speaker assignments
- Review low-confidence words (highlighted in yellow/red)
See the Editor Guide for detailed editing instructions.
Step 6: Export Your Transcript
When you're satisfied with the transcript, export it in your preferred format:
| Format | Best For |
|---|---|
| Word (.docx) | Formatted documents with speaker labels |
| Text (.txt) | Plain text for further processing |
| SRT | Subtitles for video |
| CSV | Data analysis and spreadsheets |
| AI Minutes | Automated meeting summary with action items |
Click the corresponding export button in the editor toolbar to download your file.
What's Next?
- Learn more about the Dashboard
- Explore the Editor features
- Try AI Meeting Minutes for automatic summaries
- Set up Workspaces to organize your projects